BackBlaze B2 is a great option for storage with CloudContainer and can be significantly cheaper than storing files in Amazon S3, even when compared to Amazon’s Infrequent Access storage tier. The setup process is also significantly easier.
Create a bucket
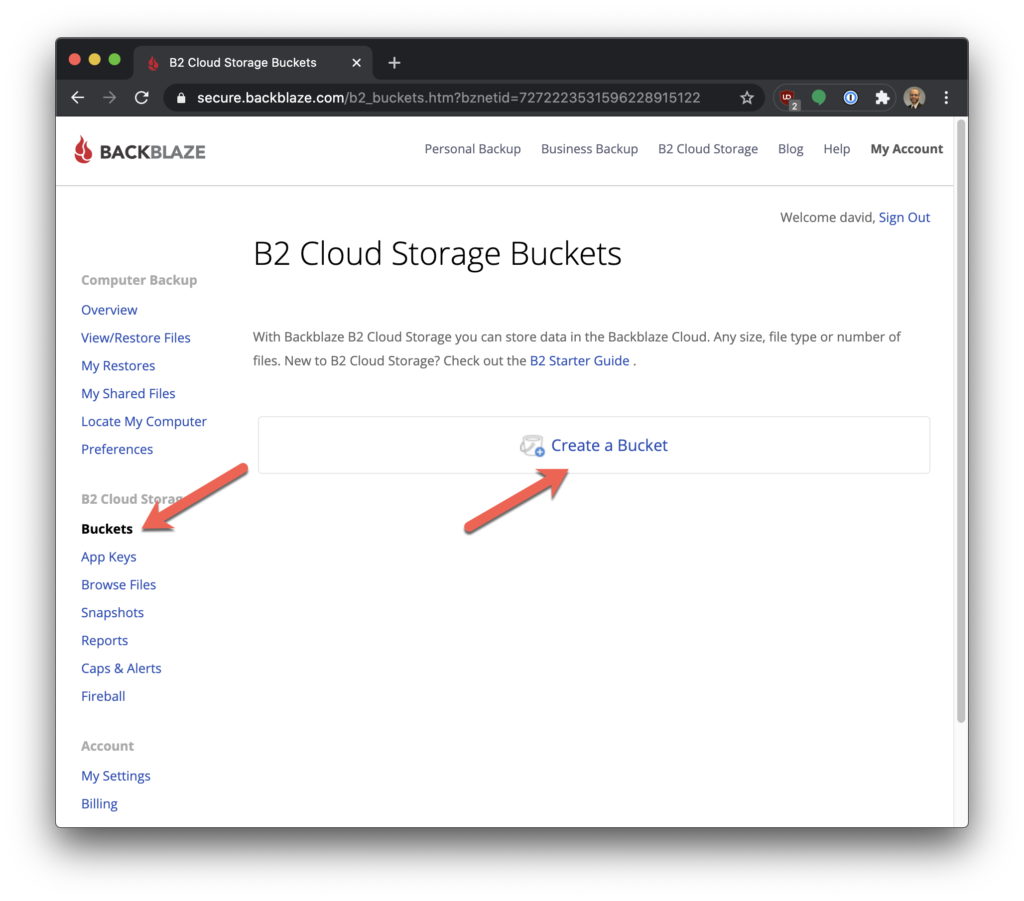
The first thing to do is to create a bucket to store your files in. Log in to the BackBlaze admin console and select the Buckets option under B2 Cloud Storage. Then click Create a Bucket to make a new storage bucket.
Give the bucket a name such as “CloudContainer-MyDatabaseName” and leave the bucket as “Private.” Finish creating the bucket and you should see it in the bucket list.

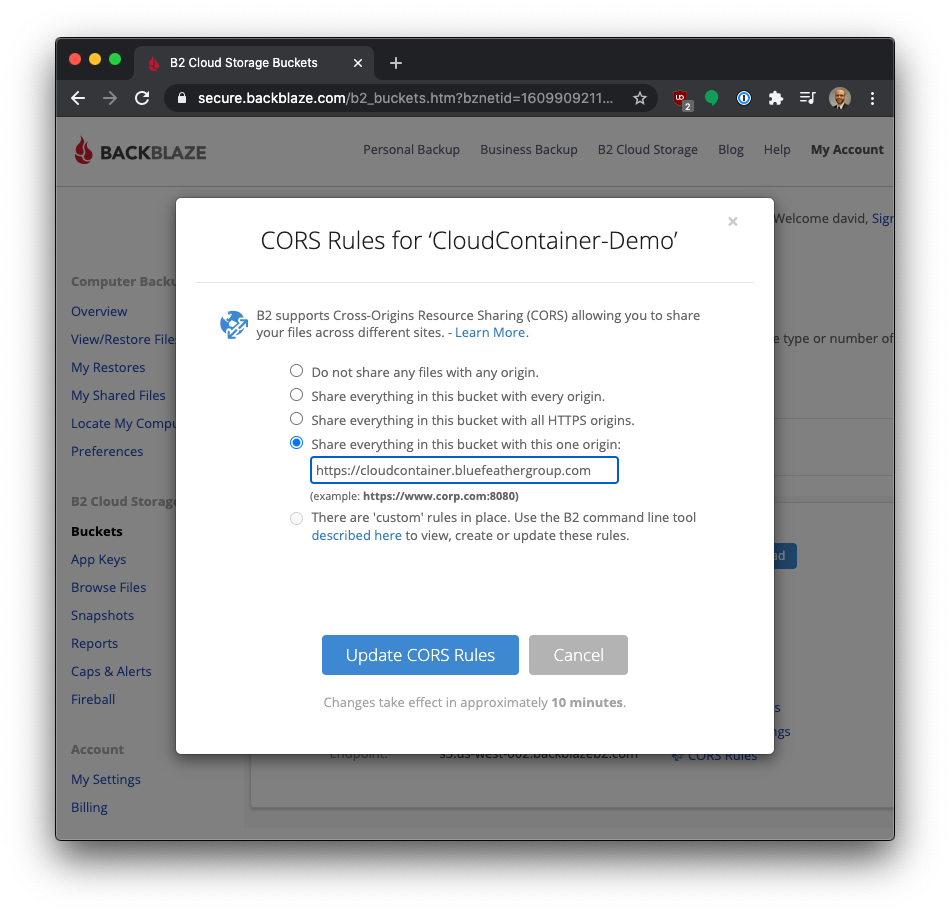
We also need to adjust the CORS policy to allow files in the bucket to stream into CloudContainer. Click the CORS Rules button in the lower right of the newly created bucket and add https://app.cloudcontainer.cc and https://cloudcontainer.bluefeathergroup.com as a allowed domains.
Create an application key
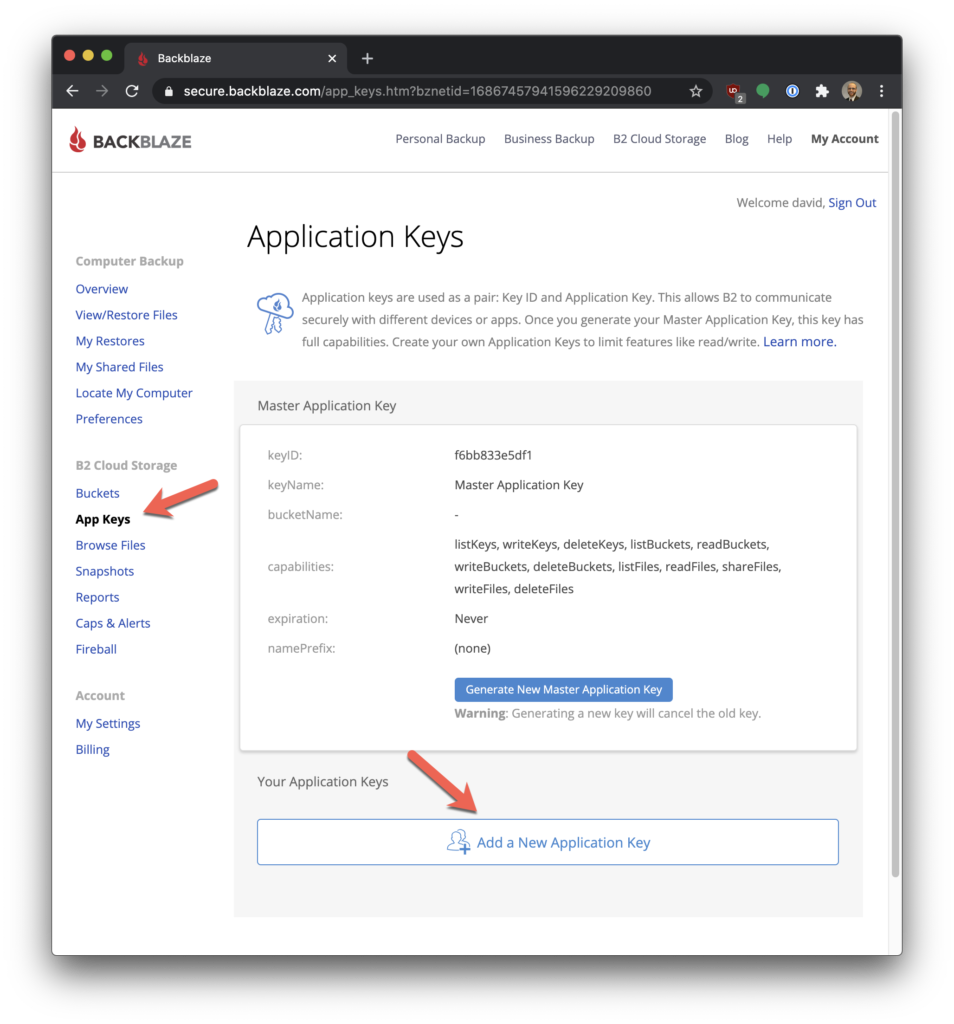
Next, you’ll need to create an application key for CloudContainer to use to connect to BackBlaze. Select “app keys” from the menu on the left and then click “Add a new Application Key” to open the new key creation window.
Enter a key name and pick the bucket you created for CloudContainer to save files to. Be sure “Read and Write” is selected as permissions so that CloudContainer can upload and download documents.
Retrieve Credentials
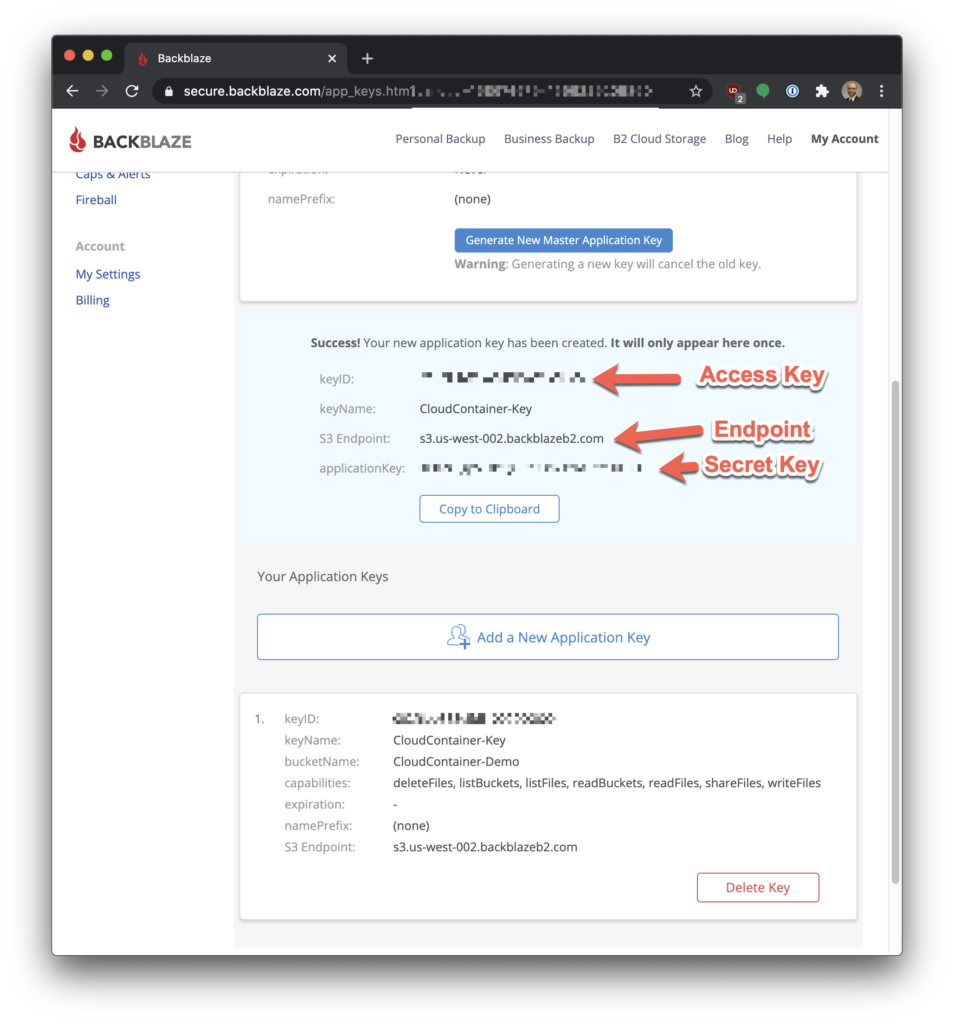
After creating your key you will be taken back to the key list. This screen will show you the credentials you need to give to CloudContainer in the next steps. Securely store this key information as you will not be able to retrieve it from BackBlaze after you leave this screen.
At this point we’re done configuring BackBlaze and will need to go back to the CloudContainer admin console to enter the newly created credentials in the second part of the Cloud Container account setup.