Amazon S3 is one of many CloudContainer compatible storage platforms. While not the cheapest, it is very powerful and provides many easy integration options with other Amazon services. You will need to create a new bucket to use with CloudContainer and then generate credentials for CloudContainer to use through the IAM console. The setup process is a bit more complex than some other platforms, so we’ve created a guide here.
Create a new S3 Bucket
Log in to your AWS account and go to the S3 console by using the link here or by clicking on Services at the top of the page and then selecting S3 under the storage section in the list of services which open. If you do not currently have an Amazon Web Services account you can create one for free.
Click the Create Bucket button to make a new S3 bucket. This is where the files you upload to CloudContianer will be stored. Give the bucket a name which you will recognize. Names must be unique across AWS, so something like cloudcontainer-yourcompanyname may be a good choice.
Select a region for your bucket (and remember which you select!) which is near where your users are located. The rest of the settings on this page should default to good settings. Buckets should be blocked from public access and the advanced settings should be fine for most users. Create the bucket and you will be returned to the bucket list in the S3 console.
Click your newly created bucket to go to the bucket configuration page. We need to adjust a security policy to allow browsers to recognize that it’s safe to load S3 resources in CloudContainer. Select the Permissions tab, then scroll down to “Cross-origin resource sharing (CORS)“. Add the JSON below into the CORS configuration editor window and click Save.
[
{
"AllowedHeaders": [
"*"
],
"AllowedMethods": [
"GET"
],
"AllowedOrigins": [
"https://app.cloudcontainer.cc",
"https://cloudcontainer.bluefeathergroup.com"
],
"ExposeHeaders": []
}
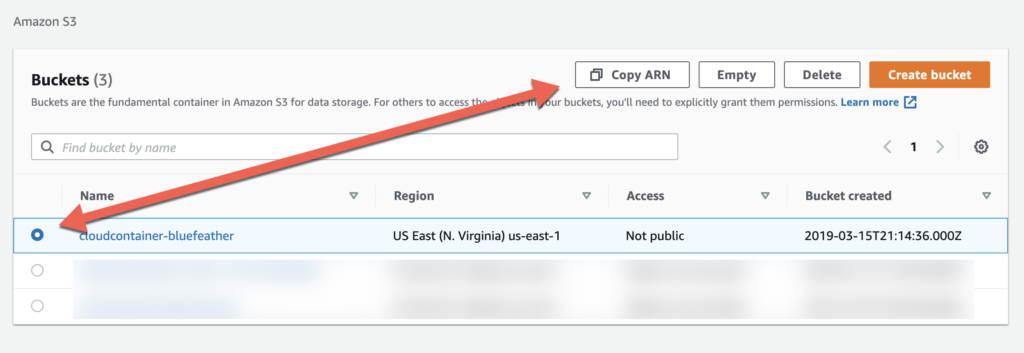
]Click the radio button next to your newly created bucket and then click the “Copy ARN button” to copy the ARN (Amazon Resource Name) to your clipboard and make a note of it. This value will be used for setting permissions to access this bucket.
Create a new security policy
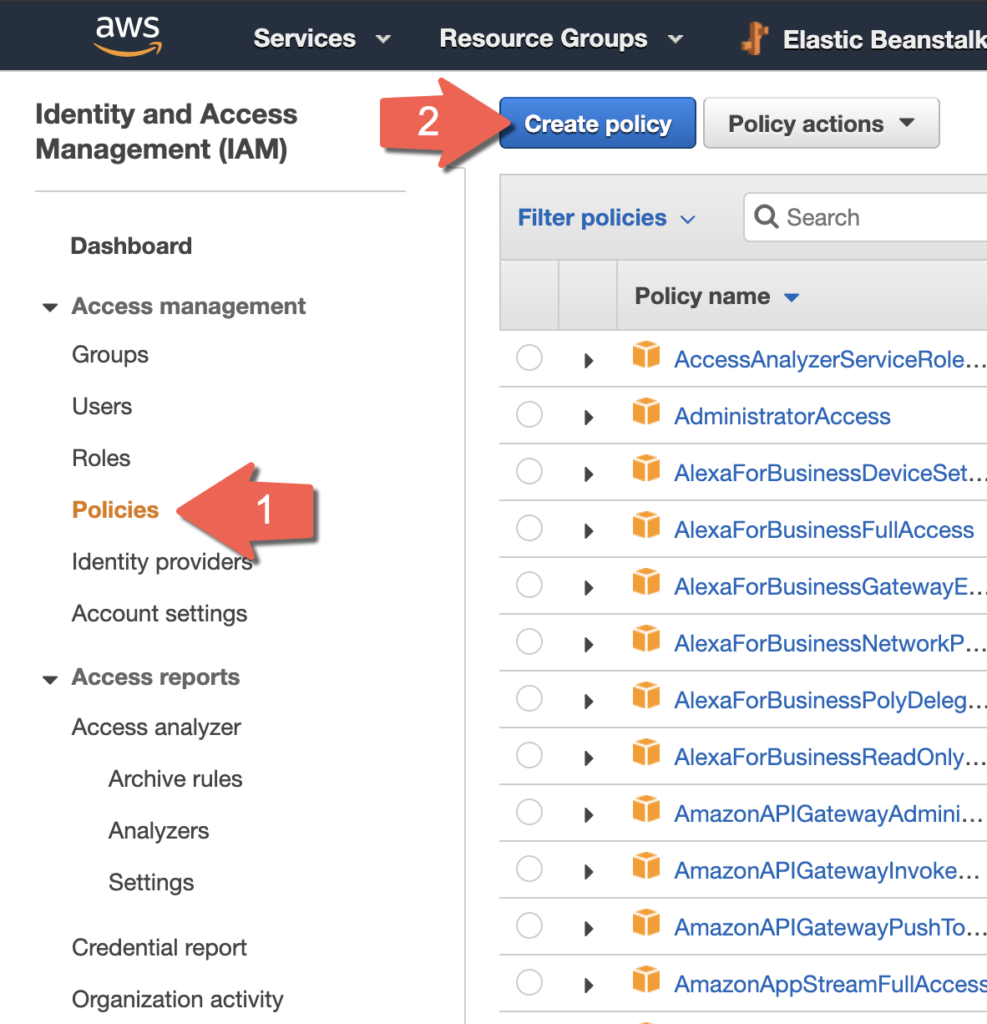
With the S3 bucket created we need to create a security policy which will allow access to the bucket. Go to the Identity and Access Management (IAM) console in AWS which will allow us to create the new security policy. Select the Policies menu on the left and then the Create policy button to make a new security policy.
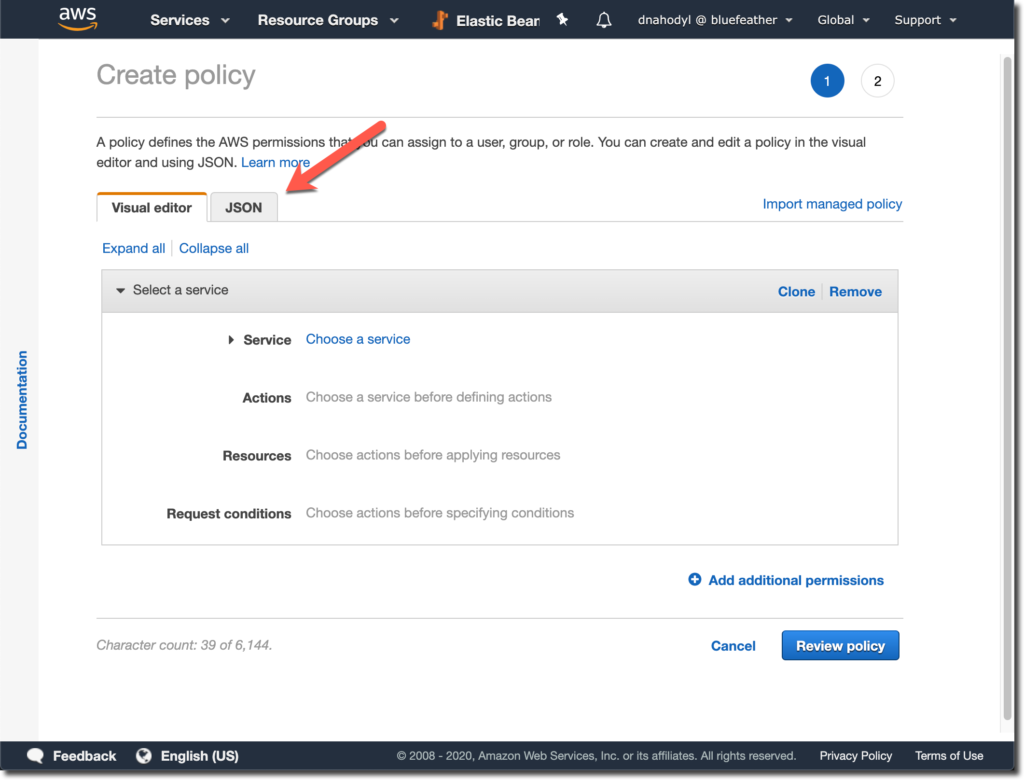
Select the JSON tab. It’s possible to configure the policy using the options on the screen, but it’s simple enough to use the following JSON to set the policy.
You will need to replace the “Resource” value in the JSON below with the ARN you copied when setting up the bucket. In the sample below the ARN is “arn:aws:s3:::my-cloudcontainer-bucket” and will need to be replaced on lines 13 and 14. Be sure to not delete the trailing “/*” on line 14.
{
  "Version": "2012-10-17",
  "Statement": [
    {
      "Sid": "VisualEditor0",
      "Effect": "Allow",
      "Action": [
        "s3:PutObject",
        "s3:GetObject",
        "s3:ListBucket",
        "s3:DeleteObject"
      ],
      "Resource": [
        "arn:aws:s3:::my-cloudcontainer-bucket",
        "arn:aws:s3:::my-cloudcontainer-bucket/*"
      ]
    }
  ]
}

Select the Review policy to continue. Give the policy a name like “cloudcontainer-s3-access” and a description so you can search for and recognize it. Click the Create policy button to finish creating the new security policy.
Create a new IAM User
Now that we’ve created both the S3 bucket and the access policy we can create a new user for CloudContainer to use. We’ll grant the user permission to access the S3 bucket using the security policy we just created.
Select Users on the left side menu and then click the Create user button to create a new user.
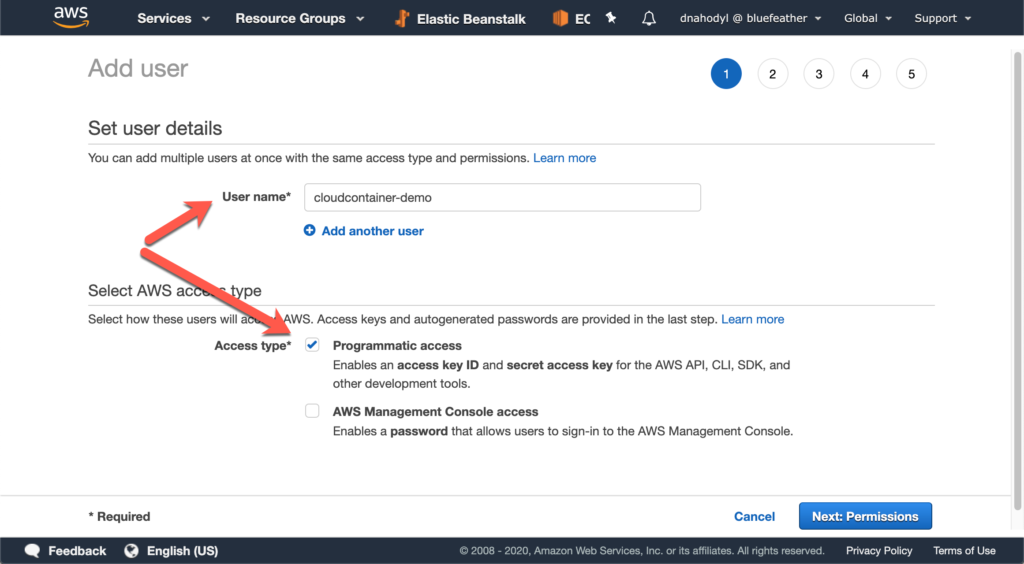
Give the user a name you’ll recognize, such as “cloudcontainer.” To create programmatic access through access keys, you will generate them after you create this IAM user. Click Next: Permissions to move on to the next screen.
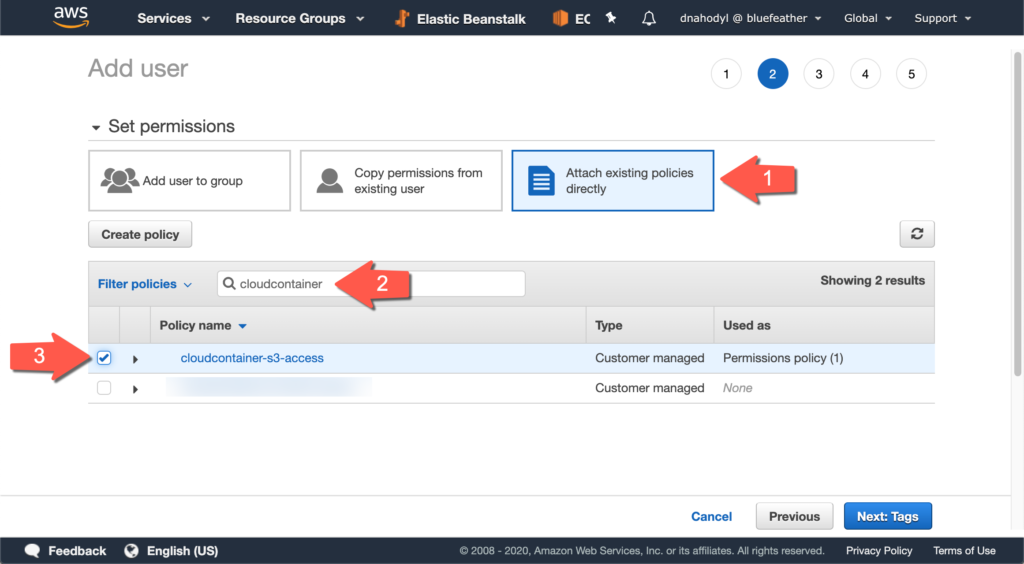
On this page we’ll grant this user the right to access the S3 bucket we created using the policy we created. Select Attach existing policies directly so that we can attach the security policy to this user. This will list all of the policies available, but we’re going to only want to attach the one policy we created earlier. Search for your CloudContainer policy and then check the checkbox next to it in the list to select it.
Click Next: Tags and then Next: Review. Review the settings you entered here and make sure it matches what you were trying to set before clicking Create user to finish creating the new user.
The user is now created! Click Create access key in the Summary section of the user’s page to create an access key.
Select “Third-party service” as the use case and tick the checkbox to confirm key creation. Click Next to move to the next page, and then click Create access key.
Copy and store the access key and secret key shown on this page or download the CSV. These values are used like a username and password for applications. You’ll need to enter these credentials into CloudContainer to grant it access to your S3 bucket.
At this point we’re done configuring S3 and will need to go back to the CloudContainer admin console to enter the newly created credentials in the second part of the Cloud Container account setup.